|
An Intro to Modeling with Foam
(Notes from our October, 2011
presentation)
By Pat Deluhery and Ron Harrison
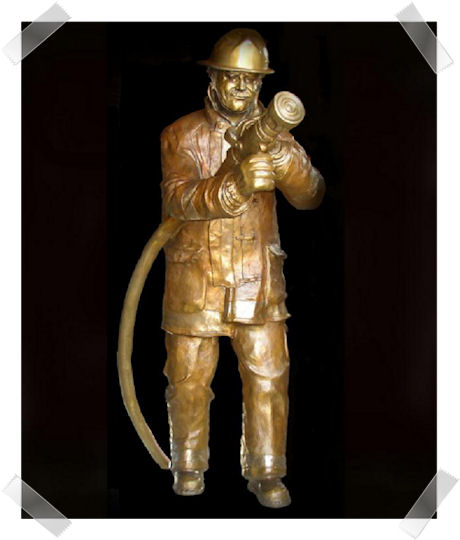
911 Memorial Foam Sculpture
by Colette Pitcher of Showcase
Art Center
www.colettepitcher.com
1.Use. Foam is on
the rise for use by modelers, railroad enthusiasts,
theater groups and decorators. Check out the number of
foam decorations and other times available in any
discount store. You can do anything with foam easily
and cheaply!
2. About the
foam. There are many different types of foam generally
available, from the white beaded stuff used to pack
electronics to the green floral foam used in flower
arrangements. The type of foam used depends on the job.
If you need good detail definition, one of the best
types is the foam insulation available from home
construction suppliers – either pink or blue(waterproof).
Only drawback is you have to buy this in 4X8 sheets.
3. Safety.
There are two things to watch out for: The tools get
hot; and, depending on the foam , vapors from heat
cutting may be toxic. It’s wise to check out the
cautions for any foam you buy. It’s ALWAYS wise to do
your work in a well-ventilated area, and don’t breathe
the vapors.
4. Tools: There
are a variety of tools available depending on the job.
-
There is a “U”
shaped tool called the Sculptor that works like a
wood plane.
-
The Knife is
basically a stiff wire 6-8” long, and is the most
versatile for general use.
-
An Engraver is
similar to soldering iron in looks and is used for
creating fine detail.
-
There is a large
bow for big jobs – like theater sets, as well as
various special tool such as a band saw like device
for fine cutting.
-
You can spend as
little or as much as you like. A good basic knife
costs about $20 and will be adequate for most jobs.
If you’re doing lots of work, you may decide to
invest in some of the other and more expensive
tools.
-
A good place to
look is: The Hot Wire Foam Factory. Google it
online. This is not a recommendation, just a place
to start.
-
You can also cut
and shape foam with hand tools such as a serrated
knife, but it’s very messy. Hot tools are the best.
5. Examples
of Projects:
-
Trace a pattern
with a stylus onto a piece of foam, then cut it out
with a Knife. You can make whatever you can draw or
trace.
-
Use a Sculptor to
carve out scenery for a model display or train set
up.
-
Use an Engraver
to cut rocks or bricks into a wall.
-
Sculpt a bust or
figure like the 911 Memorial above.
6. Sealing,
Strengthening and Texturizing. After cutting our you
pattern it is important to seal it to prevent absorbsion
of moisture and to accept paint.
-
A simple but
effective seal is Elmer’s (white) glue and water –
about 50/50 mixture.
-
There are many
other commercially available sealants to do a
variety of other jobs, such as add strength, texture
or weatherproof.
-
For many jobs
inside or outside, a good coat of exterior latex
paint will do nicely.
7. Paint. Now you’re
ready to paint with a good acrylic or latex paint. An
airbrush is ideal for many of the projects we might do.
8. Glue. If you need
to glue items, such as assembling a building, hot glue
is probably the easiest. The bind is solid once the glue
cools and its easy to use. There are special foam glues,
or good old white glue or even rubber cement (better for
temporary holds) that will work well also, depending on
the project. As with modeling, it’s wise to “pin”
assemblies with a toothpick or wire to hold parts in
place and give added strength.
9. Special Effects.
Certain oil-based paints, glues and solvents will eat
the foam surface when applied. This can be useful for
creating groundwork, battle damage or showing wear on
walls or streets. Be sure to experiment fist before
applying to your project.
10. So now it’s your
turn. Go have some fun with foam and create something
for yourself!
|